
Tutorial: Main Menu with Common UI and C++ (Part 3)
The Goal
In this part of the tutorial we are going to add multiple layers to our main menu using activatable widgets.
I am not going to cover every single line of code in this post, but rather focus on the general idea behind it. For the complete code go to the github repository.
The Architecture
In order to make the most use of the common-ui-plugin, we are going to use activatable widgets to route the user input to the currently active widget.
First of all, we create a new widget that serves as the container for the active widget. I called it MainMenuContainerWidget. It only has one important widget, the UCommonActivatableWidgetStack. This stack will host our active widget. We also change the parent class of our main menu widget to UCommonActivatableWidget and use it as the default widget for our stack. The idea here is to push a newly opening window onto the stack and go back to the previous window once the top most widget is closed. Thus guaranteeing an intuitive way of handling layered widget navigation.
While the container widget needs to hold references to the widgets it can push to the stack, the pushed widgets do not need a reference to the container widget and can remain loosely coupled.
The activatable widgets have another advantage when it comes to gamepad navigation. They have a function called NativeGetDesiredFocusTarget. This function can be overwritten and return the desired widget to focus, once this widget becomes active. The function is also called when the input method changes, making the input change event we used before obsolete.
UWidget* UMainMenuWidget::NativeGetDesiredFocusTarget() const {
    return NewGameBtn;
}
Activatable widget also come with a back handler. When listening to this handler the widget will automatically deactivate once the corresponding “back” button is pressed. For this to work we need to define the “back” button. This is done via a UCommonUIInputData blueprint. The created blueprint must then be assigned via the project settings (see image below).
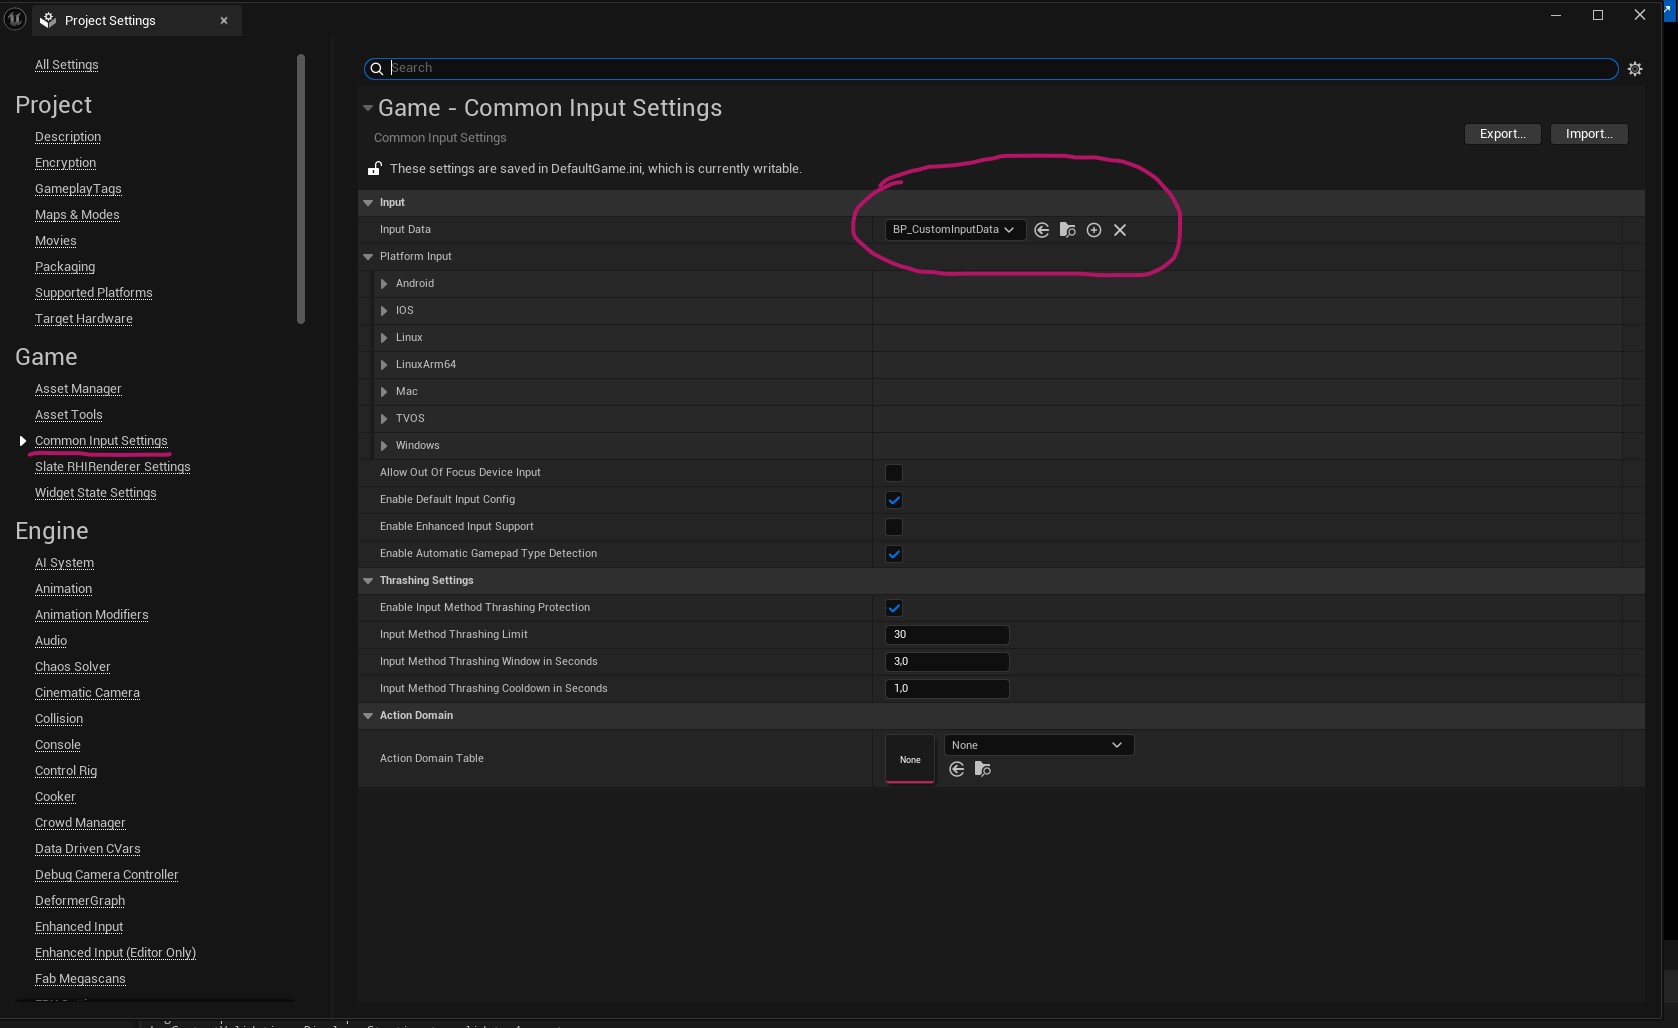 Common Input Settings inside the project settings
The input data blueprint on the other hand requires a data table for action mapping. We create this data table using FCommonInputActionDataBase as the base and add two entries: confirm and back.
 Data Table for input actions
Then assign the table and the actions to the blueprint.
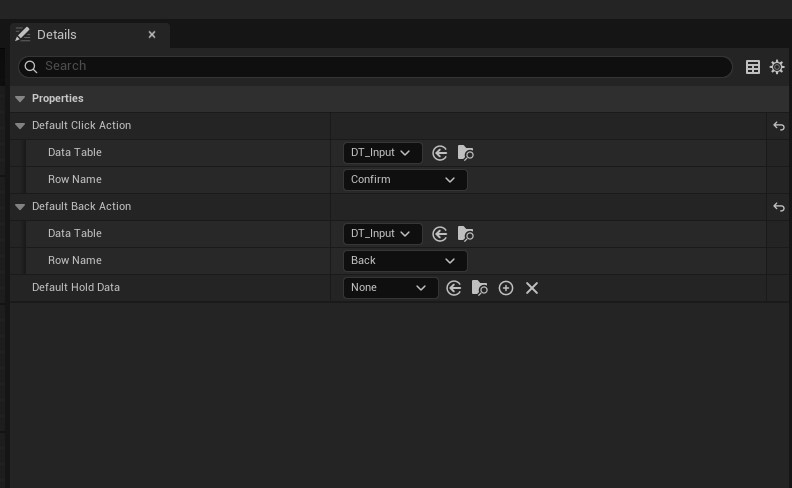 Assigned data table to input data blueprint
Last thing you need to do is to check the box “Is Back Handler” inside the setting widget’s details panel.
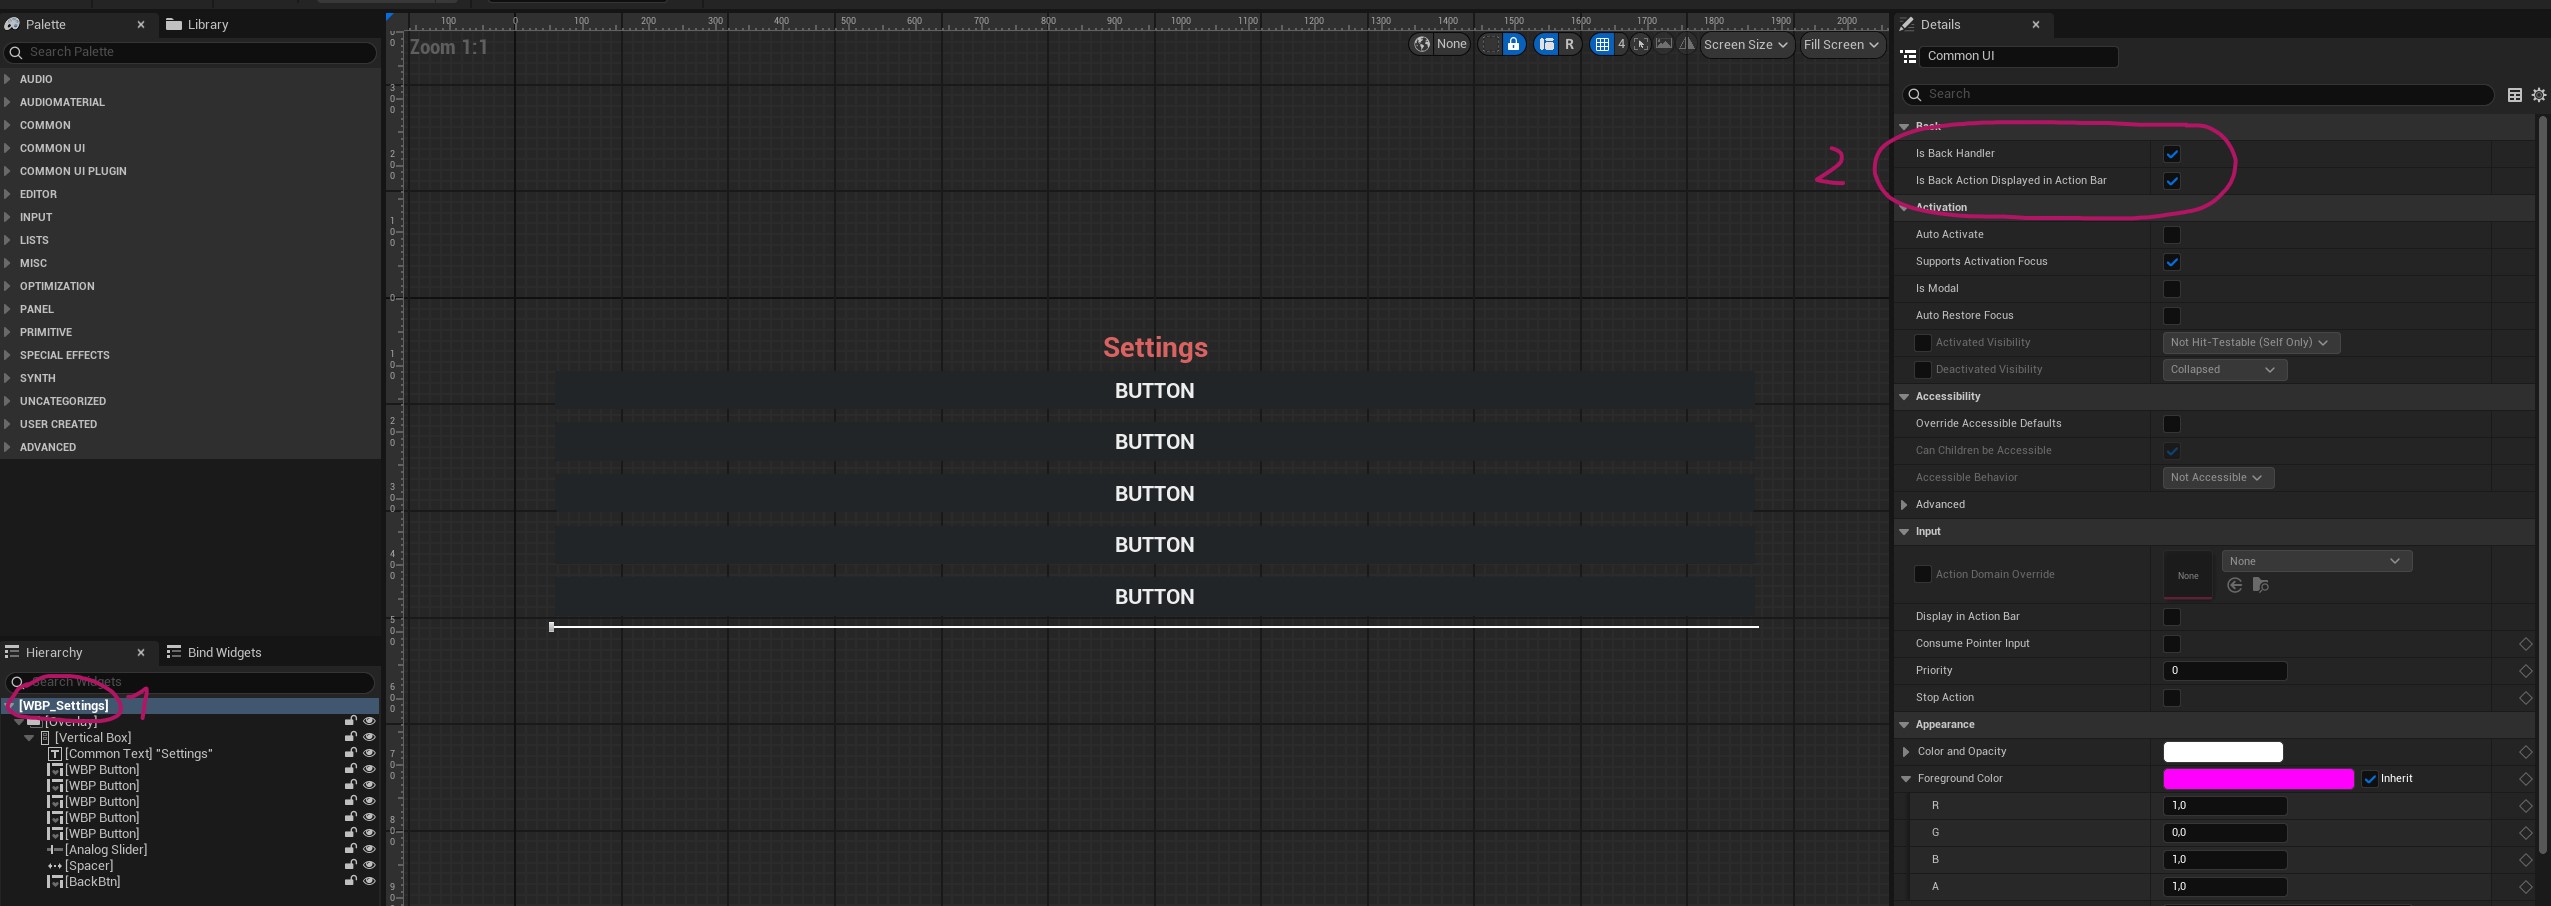 Check Is Back Handler
Now, we can open the settings menu and go back to the main menu widget simply by pressing the “B” button on the gamepad or the “ESC” key on the keyboard.
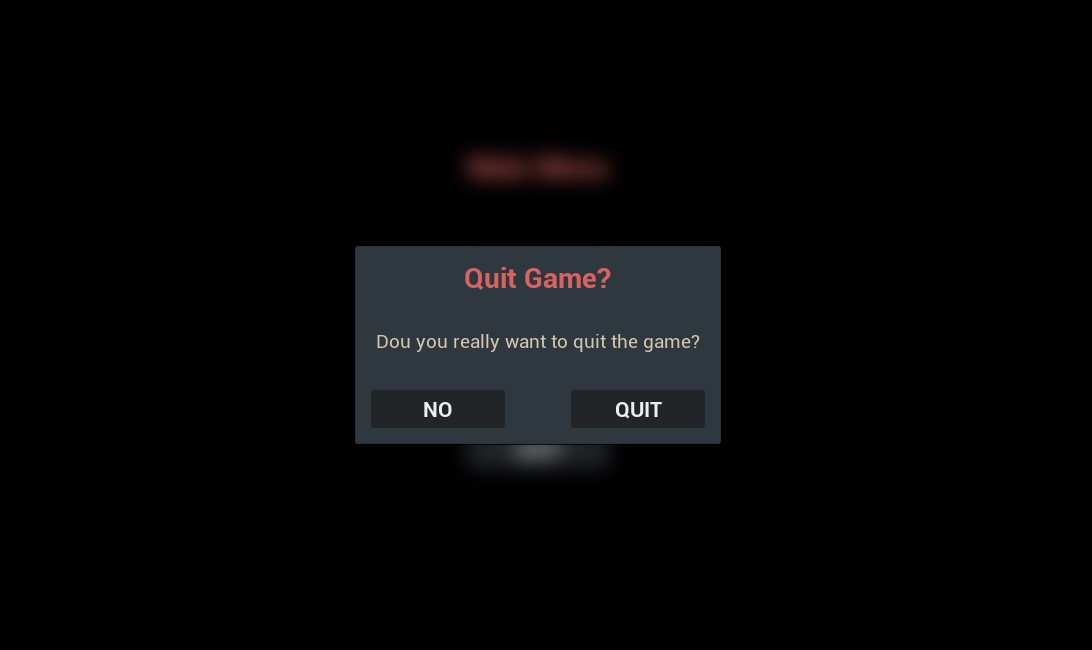
Exit Dialog
When we click the “Quit” button, a dialog should open, allowing us to either confirm quitting or cancel the process and return to the main menu. By designing this properly, we can create a reusable dialog widget for multiple purposes.
To start, we add another stack to our container. Since we want one stack to appear above the other, we use an overlay widget. The dialog stack is placed above the main stack so that it always remains in front. Alternatively, we could add the dialog directly to the main stack, but this would cause the current widget to disappear. In most applications, dialogs appear in front of other UI elements while preventing interaction with them. Both approaches are valid, but using an overlay ensures the main content remains visible.
For the dialog itself, we create a new widget containing:
- A header text block
- A body text block
- A confirm button
- A cancel button
 The generic dialog widget
Additionally, we define two delegates: one executed when the confirm button is pressed and another when the cancel button is pressed. This allows external control over the dialog’s behavior, making it more flexible. The dialog widget itself doesn’t need to handle specific actions—it only triggers the appropriate delegate when a button is clicked.
void UMainMenuContainerWidget::OpenQuitDialog() {
    UGenericDialogWidget* DialogWidget = DialogStack->AddWidget<UGenericDialogWidget>(DialogWidgetClass);
    DialogWidget->InitDialog(NSLOCTEXT("MainMenu", "QuitHeader", "Quit Game?"), NSLOCTEXT("MainMenu", "QuitBody", "Dou you really want to quit the game?"),
        NSLOCTEXT("MainMenu", "Quit", "Quit"), NSLOCTEXT("MainMenu", "No", "No"));

    // Bind to confirm event to actually quit the game using a lambda expression
    DialogWidget->OnConfirm().AddLambda([this]() {
        UE_LOG(LogTemp, Warning, TEXT("Closing App"));
        UKismetSystemLibrary::QuitGame(this, GetOwningPlayer(), EQuitPreference::Quit, false);
    });
}
The dialog widget is initialized using the InitDialog function, where we pass all the necessary text for the dialog.
Finally, we bind a lambda expression to the OnConfirm event to quit the application when the confirmation button is pressed. The cancel event can be ignored since no action is needed in that case.
See the source code on github for more details.
In the next part we are going to add CommonUI actions to our main menu.